Friday, September 2, 2011

Bottled Jewels {Sept/Oct Bee Block} kesch

a Ticker Tape Quilt-Along!

The original quilt along instructions can be found here : BOTTLED RAINBOWS TICKER TAPE

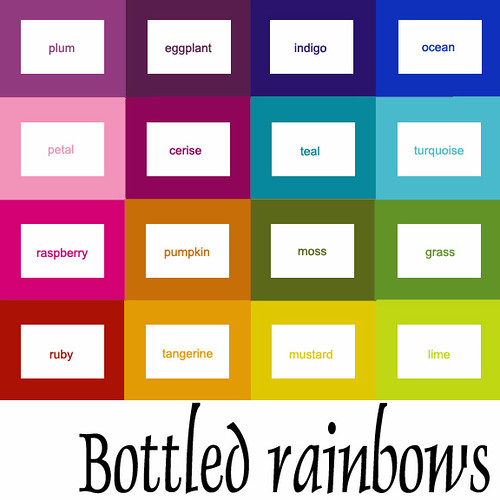
Bottled Rainbows {the button}

I want to do mine in jewel tones in honor of Autumn.


This is what you will recieve:

NOTES:
a.  please use all white thread

b.  Keep the Change - feel free to toss, share, or keep the scraps for your own stash.

c.  Add your own.  Yes you may.  If you have a fun fabric that matches the color theme you chose, feel free to add your own.  Variety is the spice of life, so thanks.

d.  if you see fabric from former bee blocks, please DO use them in the block you make.  I have been saving those bits all year long from your blocks.  So in this way it will be sort of a memory quilt for our BEE this year.

Here are the instructions on how to construck the block:  BOTTLED RAINBOWS


1. stitch snip, 2. rough layout, 3. glue, 4. mark and trim, 5. Bottled Rainbows QAL - Turquoise block, 6. Bottled Rainbows, 7. P1170845, 8. P1170881, 9. P1170886, 10. P1170926, 11. P1170923, 12. P1180033, 13. P1180030, 14. P1180070, 15. P1180071, 16. Hello! Thanks for coming., 17. Bottled Rainbows Finished, 18. Mosaic quilt back, 19. lime leaves quilt block, 20. Waiting ~ Bottled Rainbow QAYG Blocks -- Ruby and Buttercup, 21. Tangerine Bottled Rainbows Block, 22. Bottled Rainbows top - complete!, 23. Red Bottled Rainbow Block, 24. Bottled Rainbows Fabric Strips

Here you will find further inspirations:  Flickr Group,  You can scroll down this page of Sonnet of the Moon and find much inspiration for this quilt,  Here are more blocks from Pink Please!

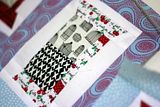
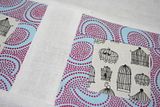
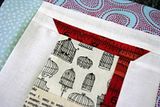
Here is the SAMPLE block I made today just to try it out.  I used scrap fabric and scrap thread so please ignore that!  Please use all white thread for the blocks I give you!


Giving you all a big PRE THANKS for all the work you put into this for me.  Thanks tons.  And happy quilting!

Tuesday, July 26, 2011

August Block: Convergence as a starting point


I took an Ricky Tims' Convergence piecing class at the Quilt Patch too many years ago and made a large square. Gave it to my sis for her 50th with the idea that I'd use it in a quilt. She gave it back, saying she wanted a quilt like the one I'd made mom and dad, adding that it would make a great quilt for her ex-husband! Hmm... So it's sat around for numerous years and I do want to do something with it, using it as a central feature in a quilt. I think you Bee-ers can help get this show on the road with your creative ideas! This is an anything goes project. If you'd like printed instructions for the convergence piece, let me know, but really anything goes! It'd be great if the blocks were between 10 and 15 inches or so, but do whatever works. There will be one fabric that I'll identify that should fit somewhere in your block. By the way, the quilt will in fact go to my ex-brother in law and his wife, as I've already made a baby quilt for their now two-year old son. Needless to say, I haven't lost a brother-in-law, but gained more family.

Here is a flickr to see more examples of this style and a blog demo:


Wednesday, July 6, 2011

Getting us up to speed...

--quilting inspiration spotted on W. 15th!


Hi there,
Just popping in to update the Bee members schedule... I believe that it is all copacetic now! Quilt on, dear friends!

--Jessica

Sunday, May 22, 2011

May- Crazy Quilt Block


Hello!
I made this block in a class by Kelly Duke at Piece by Piece. It was so cute and fun that I wanted to try for a small quilt instead of just a pillow.


Directions:

Trim muslin to 12.5 x 12.5 inches. This will be the foundation of the block.
Choose a center fabric and cut a 6 sided polygon roughly between the size of a fist and a hand.
Pin it down near the center of the muslin and sew the shape down about 1/8" from the edge of the center piece.
Choose another fabric and cut a 3-4 sided shape to sew onto one side of your center polygon that is as long as or longer than the side you are going to sew it onto. Pin to center shape with right sides together, preview if desired by flipping it back to make sure it covers the area you want it to, and sew. Press seam open.
Continue adding pieces in this way working around your center shape. It is pretty similar to a wonky log cabin.
When you have covered all the muslin press flat and trim the cotton flush with the muslin so the block measures 12.5 x 12.5" and sew around the edges about a 1/8" in to secure everything.
If you would like to add embroidery stitches please do! I have done them near or on the seam between 2 fabrics but I have also seen lovely little motifs done within the fabric shapes. Hand and machine embroidery are both fantastic and can be mixed within the block. Feel free to use the pearl cotton thread provided or use your own if you wish. Please try to keep with the hot/punchy jewel tone (?) color theme as much as possible.

General Guidelines:

Don't worry about getting it to me by the next meeting.
Please use as much or as little of the different fabrics provided as you like. Please do not add any. If there is not enough, which is quite possible, or you would like more please let me know! I have lots of extra.
Embroidery is 100% totally and completely optional. Do as much or as little as you like. Again, please contact me if you would like pearl cotton thread because I bought a lot for this project and I know that only a few of you got any from me at the meeting. This block has been my first embroidery project and so if any of you want to experiment or play with it don't worry about perfection. It will be fabulous.
I hope to make quite a few more of these blocks so if you guys could send back any reasonably sized (larger than 2.5") scraps that would be much appreciated.


Final notes:
I made a test block using one of the left over baggies. I found it to be a little less fabric than I had in mind. Please let me know if you would like a more. It was not meant to be restrictive, a puzzle of fabric economy, or anything like that. Just e-mail me and let me know.
I took photos of the steps but have been having formatting problems. Anything unclear in words? I can e-mail photos.
Questions? Please e-mail me.


Thanks,
Teddy

Wednesday, April 13, 2011

For April...Wonkiness


1. Wonky Star block for Rachel, 2. Ring of Wonky Stars, 3. RBQB: Marissa 1, 4. Wonky Star #2 for Karrie, 5. quick peek - blocks for Minty - wonky stars, 6. process pillow 3, 7. it's finally coming together!, 8. Bumblebees, Bee Europe, Wonky stars, 9. Bee Block for Janice #1 - Fresh Modern Bee, 10. Wonky star block idea 1, 11. Wonky Star 2 Bee Addicted 3, 12. EMQG mug rug swap, 13. Wonky Stars diagram, 14. Wonky star block idea 5, 15. Wonky star block idea 3, 16. Wonky star block idea 6

Plus here is one that I have done already...
just to practice & make sure this was really what I wanted...it is!

Wonky Stars

As you can see TONS of inspiration.  I have been wanting to do a wonky star quilt for quite some time, so guess what...you all get to help.  The wonky star directions above from Flickr are really great, I tried them out just to see if they work...they do! : )

  • I would like the white background.
  • Any size goes...long, skinny, fat, however you want to make them.  I will work them all together when I get them back. 
  • Make as many blocks as you like (1, 10, whatever LOL)
  • Make sure there is wonk involved.  NO perfection needed! : )
  • Each package has a main fabric that HAS to be used in the block.  It is the biggest piece of fabric besides the background. 
  • If you have a selvage in your package, please use it. 
  • I put in tons of scraps, but feel free to add some of your own if you really want to.
  • Fussy cut if you like, the main fabric is just calling out for that!
The fabric collection is Gypsy by Felicity Miller for Freespirit.

In the mosaic above are some great guildines, she has them on Flickr if you need some guidance.  Here are some more tutes at thesillyboodilly and sewtakeahike and circle of wonky stars and maverick stars and tiny wonky star...need I go on...there are tons of tutes out there, all a little different than each other and fun to try!

The scraps are yours to keep...so stash away!

~Denise

Monday, April 11, 2011

Staying current...

Hi guys,
I know that I am feeling like I am getting behind on my bee blocks, so this is really a speech from the choir... I just wanted to give you all a shout out to remind you to try your very best to get your bee blocks to their owner in a timely fashion. We are all adults, we know what we need to do...
Agnes I promise your block is coming on Wednesday! :)

Buzzzzzzzz buzzzzzzz buzzzzz

Jessica

Wednesday, March 9, 2011

It is getting so cool!!

I love all of the work you guys did!! I am going to make more... maybe I will finish this by 2012!

Monday, February 14, 2011

Blocks for Jessica

I'm sorry to have missed the Meeting this month, and I'll be missing next month too :(

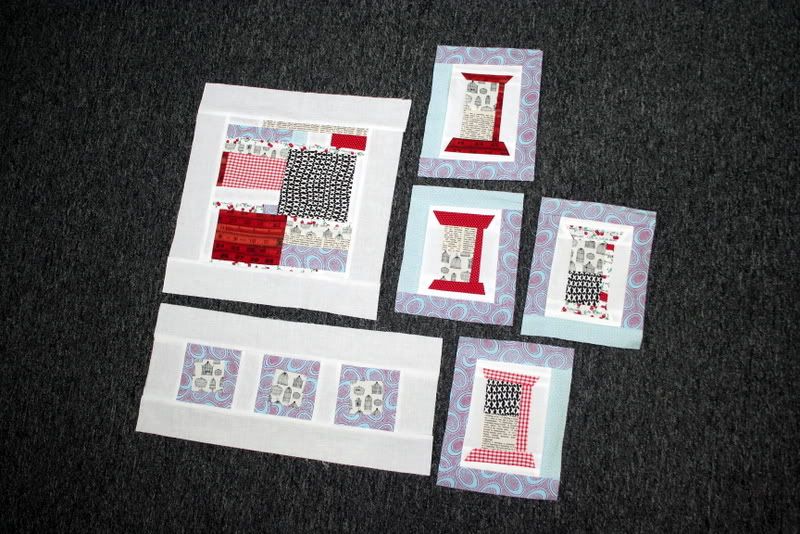
I really wanted to share the blocks I did for Jessica for the Bee. So here they are. The spools were fun. :) I was going to stop there, but I used up the rest of the scraps to make the other two blocks ;)

Photobucket

Photobucket Photobucket Photobucket

Wednesday, February 9, 2011

February - Stars and pinwheels!


1. RBQB: Marissa 1, 2. First snow, 3. Wonky Stars, 4. Scrappy Stars, 5. shaping up!, 6. Flea Market Fancy mini quilt, 7. starquiltfront, 8. starry night table runner top, 9. oh, my stars

(Sorry about any cross posts. Here is the original post from my blog yesterday. I'll keep all Bee related topics on this blog from now on.)

Has it been 4 months since the inception of EMQG and 3 months since the Bee started? February is my month and I'm excited to say that the blocks resulting from this month will be put towards a twin sized quilt for my older daughter. A few tidbits about my daughter. She's 5, girly-girl, loves pink and purple, fairies, princesses, ponies and monsters. I'm not sure where the last one fits in. There have been so many warm, sunny days in January that I've been dreaming about summer hence the stars and pinwheels. For some reason they remind me of those types of nights. And to be honest, it will probably be summer before it's actually completed!

I have a vision, yes a vision of a quilt bursting with randomly placed stars and pinwheels here and there and some embroidery of stars/pinwheels in the blank white spaces. Vague? well, it's a blurry vision. :-)

So this month's challenge will be to create a star or pinwheel block (traditional and wonky are both fine) on a white background. They don't have to be centered in the block, there can be multiple stars/pinwheels in one block, big, small. They can be 6.5", 9.5" or 12.5" unfinished blocks. You can add from your own stash if you like. I've included alot of different prints and I do love the scrappy look. By all means, make more than one if you desire (ans if there's enough fabric)! I love to see the unique creativity everyone has given the same parameters. It's amazing how many different interpretations there can be on stars and pinwheels!

Please return the unused fabric as I'll be using the remaining fabric to make more scrappy stars or add them to a pieced backing. I'm looking forward to seeing what you all come up wtih! Happy crafting <3

Agnes

Sunday, January 23, 2011

A button, a button...

Hey there,
I thought that it would be fun to get a button together for our bee.... maybe a catchy name?? It would be fun to put a button on the main blog and then on our personal blogs. ALSO, I can add all you bee members as authors on this blog. Then you can post your inspiration pics and fabric pics and things like that. Leave comments here for name suggestions and/or button ideas. I am also going to put together an email list for the group and I will send out a note to you all so that we all have the same list.

If you do not want to post your own stuff here. Send the pictures and an email of what you want to post to me and I will plop it on here. (You might want to try blogging though, it is really fun!)

Jessica

P. S.
Did every one (besides Stephanie get a fabric pack?? I have 2 extra, but I may have counted wrong initially.)
Thanks!
JMB

Wednesday, January 19, 2011

January-- Jessica!!

1. scrappy hex crib quilt, 2. Gnomes for Matt and Jody, 3. odd fellows cross, 4. double nine-patch, 5. Shoo Fly Quilt - DQS8, 6. Placemat Quilt Swap 2 Sent, 7. the whole thing, 8. DQS5front, 9. DQS5 Quilt for ... ???, 10. Bee Quilt Out of the Box- October, 11. My row 10 quilt, 12. XOXO quilt, 13. flower pot quilt, 14. Black Bird's Chair, 15. Dorothy's Spools, 16. Gwenny's Baskets, 17. Inspired by Anna, 18. Vintage Spools Block for me!, 19. All Present & Accounted For, 20. Chair Quilt

So here are some quilts for inspiration... I am really in to traditional blocks in different colors right now. What I am thinking for this quilt is "chairs and spools" as a theme. That said, I think that I am going to make a big chair for the middle of the quilt and I would like all of you to explore making a spool type block or a quirky traditional type block. I love Gwen Marston and Freddy Moran and their collaborative quilting style. I also am a big fan of Tonya's letters and her new book.
The little packages are all waiting for you guys... you can have them tonight at the meeting!!
To challenge all of you I picked an eclectic mix of red and light blue with some black and whites mixed in. If you want to add some appropriate solids or neutrals (Black and whites are neutrals in my book!) from your own stash. I am going to put the quilt together very collaborative quilting style so I was thinking of blocks that will finish at 6", 9", or 12". Have fun!! Post here if you have any questions. See you tonight!